Monday, May 9, 2011

Boho Bird

Hello, friends! I have certainly missed updating my little ol' blog, but the month of April was a crazy one for us! We were out of town ourselves, then we were blessed to have guests in town for several weeks. My craft room is also the guest room, so no crafting while guests were here! But now it's back to life as "usual", whatever that means. :)

This is the first card I've made in weeks, and I am quite pleased with how it turned out. The main stamp set is Friends 24-7. I feel like I always use this one but I do love it so!


I was going for a bit of a shabby chic feel for this card so there is lots of tea dye ink around all of the edges, along with the small splatter image from Itty Bitty Backgrounds. Even the large flourish image in the background was stamped with tea dye!

For the circle element, I stamped the bird in brown and then clear embossed over top. I then cut a mask for the bird from scratch paper so I could stamp the flourish over top. The edges of the circle were distressed with a bone folder.


I pulled out my sewing machine again to add some zig zag detail in the upper right corner. This is just my second time sewing on my cards so I am still learning. It took me a while to set up and get the correct tension on my machine. But I love the effect and that I was able to find matching thread!


Thanks for coming by to spend part of your day with me, have a wonderful week!

*Hugs*

SUPPLIES
Stamps: Friends 24-7, Baroque Motifs, Itty Bitty Backgrounds
Paper: Crumb Cake, Very Vanilla

Ink: Chocolate Chip, Cool Caribbean, Vintage Touch Tea Dye Duo (PTI)
Embellishments: clear embossing powder, seam binding, button, jute, thread

Tools: Cutter Bee Circle Cutter, embossing gun, stamp-a-ma-jig, sewing machine

Monday, March 28, 2011

Crocheted Baby Blanket

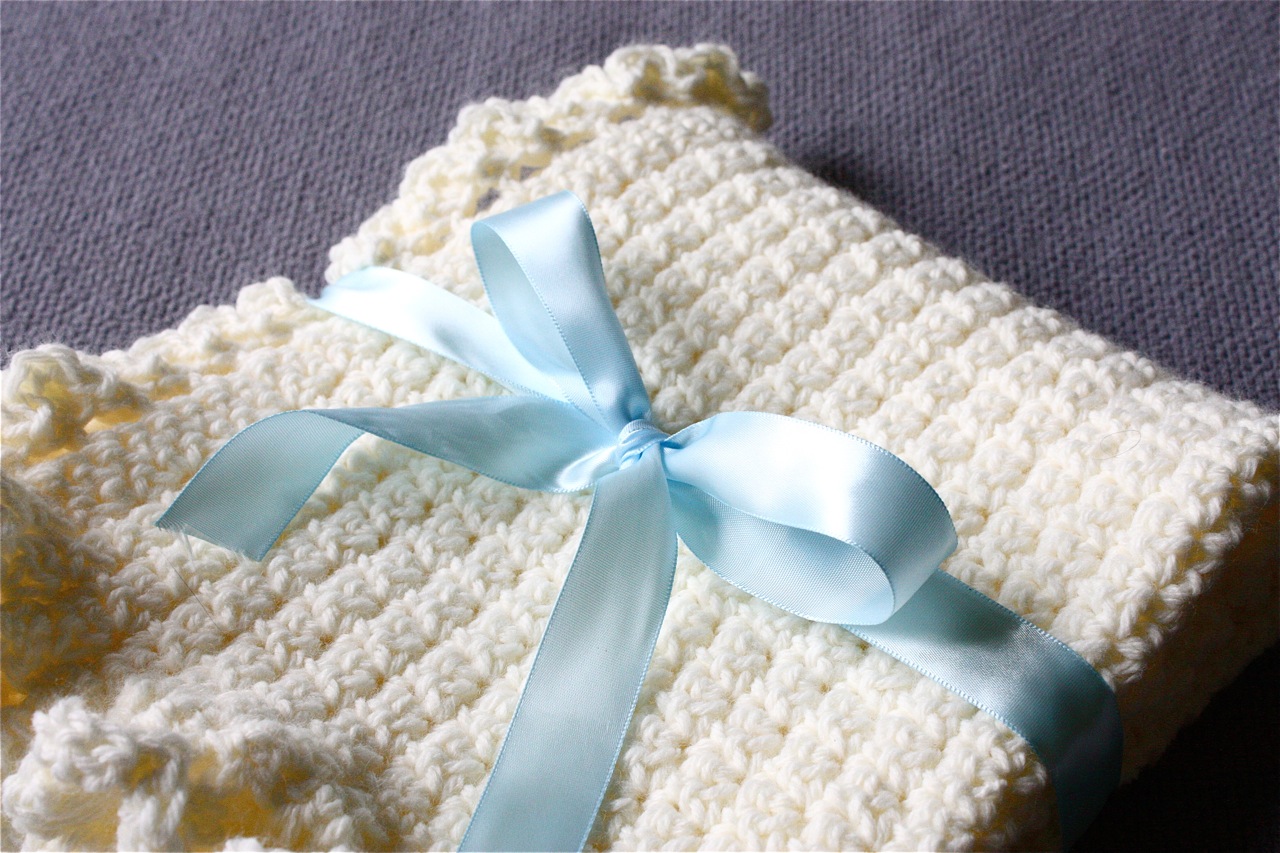
I have been busy the last couple of weeks crocheting this baby blanket for a friend who's shower was this past weekend. If there has been a dearth of cards on the blog lately it is because I've been tangled up in yarn! This is my most ambitious crochet project to date and despite some difficulties it was very fun to make. It is such a pleasure to be able to make something special like this for a special baby.


The pattern is one from the Lion Brand Yarn website that was both rated Easy and had good reviews. I wanted an easy pattern as I am what you might call a self taught crocheter. I read books, watch online videos, etc. but I've rarely had other crocheters around me to compare notes with and see if I am doing things right. So when it came to following the pattern for this blanket, it all seemed straight forward enough as I read through it. But as I progressed to the scalloped edging, well, let's just say I winged it a bit because things weren't quite working for me. I'm sure the pattern was fine, most likely operator error was involved!

To make a long story of stitching, unraveling, stitching and unraveling short, I swapped the 5 dc, which the pattern required for each shell, to a sc 3dc sc combo instead. This made them slightly smaller and less prone to ruffling. Yes, yes. I know mine looks like a ruffly pom pom trim now, but you should have seen it the other way before I tore it out!

All in all, I am very pleased with how it turned out, and I do like the ruffled look I unintentionally ended up with. Here it is all dolled up ready to be wrapped!

Monday, March 21, 2011

Happy Spring!

The first day of spring was yesterday (hurray!) and to celebrate I made a bright and cheery flower card. The layout was inspired by the ever talented Lisa Johnson; you can see her card here.

The flower bouquet image is from Happy Moments and has actually never seen ink. I've pulled it out many times to use on a card, but somehow I always ended up going in a different direction. So I'm super happy to finally have used it, it's so cute! Like my last card, I stamped it in Versa Fine so that I could water color it without having the outline bleed.


I adhered the small turquoise ribbon loop with red sticky tape, then sewed the button to overlap slightly.

Thanks for visiting and I hope you have a marvelous week!

*hugs*


SUPPLIES
Stamps: Happy Moments, Trendy Trees
Paper: Pink Pirouette, Whisper White, Tempting Turquoise, Bella Rose dp

Ink: Versa Fine Onyx Black, Basic Black, Pink Pirouette, Rose Red, Tempting Turquoise, Old Olive
Embellishments: paper doily, Tempting Turquoise grosgrain ribbon, button, white embroidery thread

Tools: scallop circle punch, cutter bee circle cutter, aqua painter

Thursday, March 17, 2011

Happy St. Patrick's Day!


Though I don't have a leprechaun or shamrock themed card to share with you, I do have a green one. Close enough, right?

This is a simple little baby card that could be for either a boy or girl, or for the mother-to-be who opted to be surprised! The pea image was stamped using Versa Fine Onyx Black ink. I then water colored it with Old Olive and Certainly Celery using an aqua painter brush. The scalloped window was punched with a Marvy Giga Scallop Oval punch. The green frame is popped up with foam tape to give the card some depth.


The inside was done simply as well. It is lined with a white panel to make writing easier, then trimmed with matching scalloped green paper. Easy peasy as they say! *grin*


SUPPLIES
Stamps: Eventful
Paper: Crumb Cake, Whisper White, Old Olive Textured

Ink: Versa Fine Onyx Black
Embellishments: white satin ribbon

Tools: Marvy Giga Scallop Oval punch,
aqua painter, foam tape

Monday, March 7, 2011

1st Publication!

I am so excited to finally be able to share with you this little tag, because it is my first ever design to be published! It was featured in the February issue of CARDS magazine and I couldn't be more excited. I was literally stalking the news stands last month waiting for it to come out. :) I hope you enjoy this belated Valentine treat!

Have a great week!

Wednesday, March 2, 2011

Butterfly Birthday Card

This card has been sitting on my desk in pieces for a few weeks and I finally finished it yesterday. What took me so long? The sewing! Yes, I know, there is barely any stitching on the card at all. And once I began it did just take a few minutes. But I had never used my sewing machine before, you see. This was its inaugural project! For me at least. The sewing machine used to belong to my great grandmother and my sister and I inherited it from her. It has been a while since I had used any sewing machine at all, so it took me a while to read through the manual (with lovely 1950's illustrations!) and get it set up.

Not only had I never used this machine, but I had also never sewn on my cards before. There are so many other card makers I admire that have been doing this for years, so it is nothing new, but I am happy to finally be able to do this myself as I think it adds so much to a card. I love the texture and home made feel it adds. I'm sure you'll be seeing more of this! *wink*

So have you spotted the stitches yet? I ran a line down each of the butterflies to anchor them to the card, instead of using adhesive. Attaching them this way added some fun interest and allowed me to fluff their wings out from the card a bit.

Also, do you notice the "Happy Birthday" background behind the butterflies? I did that by stamping the one sentiment over and over again with Versa Mark ink, lining it up with my stamp-a-ma-jig.

Thanks for stopping by!


SUPPLIES
Stamps: Warmest Regards, Happy Everything
Paper: Crumb Cake, Very Vanilla, Real Red, Tempting Turquoise, Print Pack dp
Ink: Basic Black, Versa mark

Tools: 3-in-1 Classic Butterfly punch, Classic Butterfly punch (both by Martha Stewart), Scallop Edge punch (SU!), stamp-a-ma-jig, sewing machine

Friday, February 18, 2011

Elegant Wedding Card

Wow, has it ever been a long time since I last posted. Life has been busy! But things are on the up and up. It was a warm sunny day here and we have family coming to visit for the weekend (which prompted a much needed bout of spring cleaning, ha!).

But on to the card. This little beauty is one I actually made a while ago but hadn't posted yet. (See the above comment on busyness!) I love weddings and thought that with wedding season fast approaching it would behoove me to get a head start on making some lovely cards for those special occasions.

This card uses my current favorite set and a very simple cream and black color scheme. Chic, yes? The main cream panel is embossed with my Swiss Dots embossing folder for some added texture and there are two adhesive pearls accenting the flourish. The main panel is popped up on dimensionals.

Thanks for reading and I hope you have a wonderful and relaxing weekend! *hugs*


SUPPLIES
Stamps: Friends 24-7
Paper: Vintage Cream (PTI), Basic Black (SU!)

Ink: Basic Black
Embellishments: black satin ribbon, adhesive pearls

Tools: Nestabilities large oval and large scalloped oval dies, Swiss Dots embossing folder, foam tape